The Goodman GSX13 installation manual provides essential guidance for installing and maintaining this energy-efficient air conditioner, ensuring safe and proper setup for optimal performance and warranty compliance.
Overview of the Goodman GSX13 Installation Manual
The Goodman GSX13 installation manual is a comprehensive guide for HVAC professionals, detailing the proper installation and maintenance of this 13 SEER energy-efficient split system. It covers technical specifications, safety protocols, and compliance requirements, ensuring optimal performance and warranty validity. The manual emphasizes the importance of adhering to safety guidelines to prevent damage or injury. Designed for qualified technicians, it provides clear instructions for site preparation, electrical connections, and system testing. Warranty registration details are also included, highlighting the need for timely online enrollment within 60 days of installation.
Importance of Following the Installation Manual
Adhering to the Goodman GSX13 manual ensures proper installation, preventing potential risks of personal injury, property damage, or system malfunction. Compliance with safety guidelines and technical specifications is crucial for maintaining warranty validity and achieving optimal performance; Improper procedures performed by unqualified individuals can lead to severe consequences, emphasizing the need for only trained HVAC professionals to handle the installation. By following the manual, users can ensure a safe, efficient, and durable operation of their air conditioning system, meeting all regulatory and manufacturer standards.
Target Audience for the Manual
The Goodman GSX13 installation manual is designed for HVAC professionals and trained technicians, emphasizing that only qualified individuals should perform installations. It serves as a comprehensive guide for them, ensuring compliance with safety protocols and technical specifications. While DIY enthusiasts may access the manual, Goodman strongly advises against unqualified persons attempting installation due to potential risks. The document is tailored to meet the needs of professionals, providing detailed instructions and safety precautions necessary for successful system setup and operation, thus maintaining product integrity and user safety.

Key Features of the Goodman GSX13
The Goodman GSX13 offers a 13 SEER rating, energy efficiency, and capacities from 1.5 to 5 tons, ensuring compatibility with various HVAC systems for optimal performance.
Energy Efficiency and SEER Rating
The Goodman GSX13 is designed with energy efficiency in mind, featuring a SEER rating of 13, which ensures optimal cooling performance while minimizing energy consumption. This rating signifies that the unit operates efficiently during peak cooling seasons, helping homeowners reduce their energy bills. The SEER rating is a critical factor in determining the overall energy efficiency of air conditioning systems, and the GSX13 meets standard energy requirements, making it an environmentally friendly and cost-effective choice for residential cooling needs. Proper installation and maintenance are essential to uphold its energy efficiency.
System Capacity and Tonnage Options
The Goodman GSX13 offers versatile system capacity with tonnage options ranging from 1.5 to 5 tons, catering to various home sizes and cooling needs. This range ensures that homeowners can select the appropriate size for their space, preventing over- or under-cooling, which can lead to energy inefficiency. Proper sizing is crucial for maintaining consistent indoor comfort and optimizing the system’s performance. The GSX13’s flexibility in tonnage options allows HVAC professionals to customize installations based on specific requirements, ensuring efficient and reliable cooling solutions. This adaptability makes the GSX13 suitable for a wide range of residential applications.
Compatibility with Other HVAC Components
The Goodman GSX13 is designed to seamlessly integrate with various HVAC components, ensuring a cohesive and efficient system setup. Its compatibility with a wide range of indoor units, thermostats, and accessories allows for flexible configurations tailored to specific home requirements. Proper compatibility ensures optimal performance, energy efficiency, and extends the system’s lifespan. HVAC professionals can confidently pair the GSX13 with compatible components to create a balanced and reliable cooling system, enhancing overall comfort and functionality for homeowners. This adaptability simplifies installation and maintenance processes, making the GSX13 a versatile choice for modern HVAC systems.
System Components and Accessories
The Goodman GSX13 includes essential components like the outdoor unit, indoor coil, and thermostat. Accessories such as line sets and drain pans ensure proper installation and functionality.
Outdoor and Indoor Unit Specifications
The Goodman GSX13 outdoor unit features durable construction with a galvanized steel cabinet and a powder-painted finish for corrosion resistance. It includes a high-efficiency compressor and fan motor for quiet operation. The indoor unit is designed for compatibility with the outdoor unit, offering a space-saving design and versatile installation options. Both units are engineered to work seamlessly together, ensuring optimal performance and energy efficiency; Detailed specifications, including dimensions, weight, and operating conditions, are provided in the manual to guide installers and technicians. Proper alignment and sizing are critical for system reliability and efficiency.
Refrigerant and Electrical Requirements
The Goodman GSX13 requires specific refrigerant and electrical configurations for proper operation. It uses R-410A refrigerant, which is environmentally friendly and compliant with regulations. The system demands a dedicated 240-volt electrical circuit, with proper fusing and circuit protection. Installers must ensure all electrical connections meet local codes and manufacturer guidelines. Correct refrigerant charging and electrical setup are critical for efficiency, safety, and system performance. Refer to the manual for detailed specifications and recommendations to avoid improper installation. Always follow safety protocols when handling refrigerants and electrical components.
Optional Accessories for Enhanced Performance
To maximize the efficiency and comfort of the Goodman GSX13, several optional accessories can be installed. These include programmable thermostats for precise temperature control, air quality accessories like UV lamps and filters, and bypass humidifiers for optimal humidity management. Additionally, optional remote sensors and smart home integration kits allow for advanced system monitoring and control. These accessories enhance performance, improve indoor air quality, and provide greater convenience. Always ensure compatibility with the GSX13 when selecting and installing these options. Consult the manual for specific recommendations and installation guidelines.

Safety Precautions and Warnings
Always wear protective gear when handling the Goodman GSX13. Ensure proper grounding to prevent electrical shocks. Follow all safety codes and manufacturer guidelines strictly. Safety first!
General Safety Guidelines
Adhere to all safety protocols when installing the Goodman GSX13. Wear protective gear, including gloves and safety glasses. Ensure the area is clear of obstacles and well-ventilated. Always follow local and national safety codes. Use properly rated tools and equipment to avoid accidents. Keep the system away from flammable materials. Never attempt installation without proper training or experience. Refer to the manual for specific safety instructions. Failure to comply may result in injury or system damage. Safety should always be the top priority during installation and maintenance. Read all warnings carefully before proceeding.
Handling and Storage Precautions
Handle the Goodman GSX13 with care to prevent damage. Avoid dropping or applying excessive force, as this may cause internal component failure. Store the unit in an upright position to maintain refrigerant integrity. Keep it in a clean, dry, and well-ventilated area, away from direct sunlight and moisture. Use protective covers if storing for extended periods. Ensure the unit is secure during transit to prevent shifting. Always follow the manufacturer’s guidelines for handling and storage to preserve system performance and warranty validity. Inspect for damage before installation.
Electrical Safety Measures
Ensure the power supply is disconnected before starting installation. Use properly rated circuit breakers and fuses to prevent electrical hazards. Ground the system correctly to avoid shock risks. Verify all electrical connections are secure and meet local codes. Avoid using damaged or undersized wires, as this can cause overheating. Install a suitable disconnecting means near the unit for easy access. Use surge protectors to safeguard against voltage spikes. Always refer to local electrical codes and the manual for specific requirements. Never work on live circuits to ensure personal and system safety.

Installation Requirements
Ensure the site is prepared according to local building codes. Verify compatibility with existing HVAC systems. Use approved tools and materials for a safe and proper setup. Always follow local regulations and manufacturer guidelines for system installation. Proper equipment, like a vacuum pump and manifold gauges, is essential for accurate installation. Compliance with safety standards ensures reliability and efficiency of the Goodman GSX13 system.
Site Selection and Preparation
Select a location with good drainage and accessibility. Ensure the ground is level and stable to support the unit’s weight. Keep the area clear of debris and flammable materials. Verify that the site complies with local zoning laws and manufacturer recommendations. Protect the unit from direct sunlight and extreme weather conditions. Ensure proper ventilation to avoid air recirculation. Check for nearby power sources and electrical connections. Prepare the site by removing any obstacles and ensuring a firm, even surface for installation. Proper site preparation ensures safe and efficient operation of the Goodman GSX13 system.
Tools and Equipment Needed
To install the Goodman GSX13, you’ll need specific tools and equipment. Essential items include wrenches, screwdrivers, pliers, and tubing cutters. A vacuum pump is required for evacuating the refrigerant lines. Safety gear like safety glasses and gloves is mandatory. Additional tools may include a drill, level, and measuring tape. Ensure all equipment is in good condition and suitable for handling refrigerants and electrical components. Refer to the manual for a detailed list to avoid missing critical items during installation. Proper tools ensure a safe and efficient process.
Compliance with Local Codes and Regulations
Installing the Goodman GSX13 requires strict adherence to local building codes and HVAC regulations. Ensure all work complies with national and local standards. Obtain necessary permits before starting the installation. Familiarize yourself with electrical and plumbing codes to avoid violations. Non-compliance may result in fines or system malfunctions. Always follow safety and environmental regulations, especially regarding refrigerant handling. Verify local requirements for ventilation and noise levels. Compliance ensures a safe, legal, and efficient installation process. Consult local authorities if unsure about specific regulations.

Step-by-Step Installation Guide
The Goodman GSX13 manual provides a detailed, sequential approach to installing the air conditioning system. Follow each step carefully to ensure a safe and proper setup process.
Pre-Installation Checks
Before starting the installation, ensure the Goodman GSX13 system is compatible with your existing HVAC setup. Verify the unit’s specifications match your home’s requirements. Check for any visible damage to the equipment during delivery. Ensure the installation site is level, clean, and free from obstructions. Confirm all necessary tools and materials are available. Review local building codes and regulations to ensure compliance. Familiarize yourself with the manual’s instructions and safety guidelines to avoid errors. Conducting these checks ensures a smooth and safe installation process for the GSX13 air conditioning system.
Mounting and Leveling the Unit
Proper mounting and leveling of the Goodman GSX13 are critical for optimal performance. Begin by selecting a stable, firm surface for the outdoor unit. Use suitable mounting brackets or pads to secure the unit, ensuring it is level. A spirit level tool can verify even placement. Check the unit from multiple angles to confirm balance. Tighten all mounting hardware securely to prevent vibration or movement. Ensure the unit is elevated above the ground to protect against water accumulation and debris. Proper leveling prevents compressor damage and ensures efficient operation of the GSX13 system.
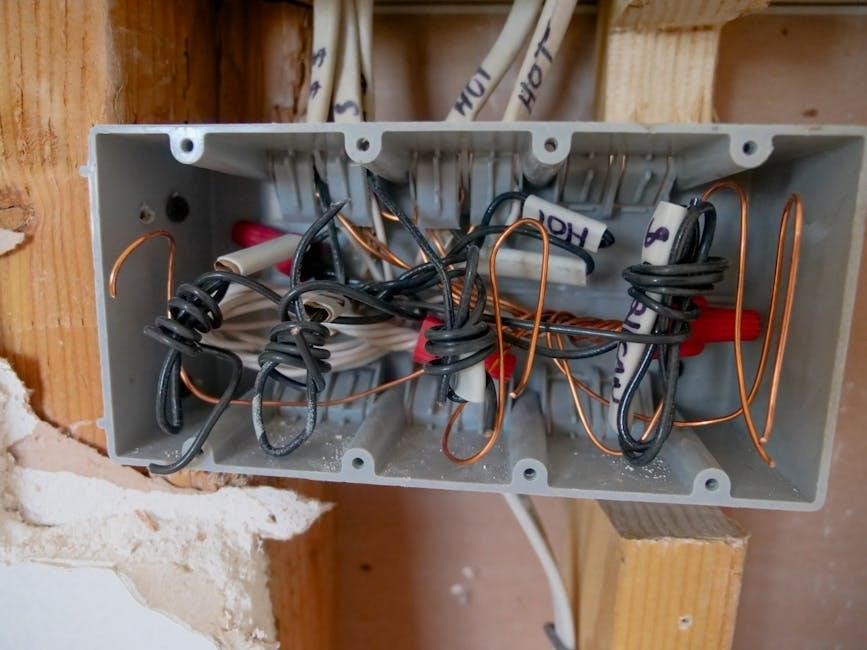
Connecting Electrical and Refrigerant Lines
Connect the electrical and refrigerant lines carefully to ensure proper system operation. Begin by following the wiring diagram in the Goodman GSX13 manual, ensuring all terminals match the correct connections. Tighten all electrical connectors securely. For refrigerant lines, use approved flare nuts and ensure they are leak-free. Apply nitrogen during brazing to prevent contamination. After connecting, perform a vacuum check and pressure test to confirm system integrity. These steps ensure safe and efficient operation of the HVAC system, as outlined in the installation guide.
Final Installation and Start-Up Procedures
After completing all connections, perform a final inspection to ensure all components are secure and properly aligned. Set the thermostat to the desired settings and power on the system. Allow it to run for 10-15 minutes to check for proper operation. Verify that the system cycles correctly and there are no unusual noises or leaks. Test both heating and cooling modes to ensure functionality. Once satisfied, record the system settings and ensure all safety features are activated. Refer to the manual for any specific start-up procedures or recommendations.

Post-Installation Procedures
Post-installation involves testing the system, checking for leaks, and ensuring proper function. Document all settings and ensure maintenance schedules are followed for optimal performance.
Testing the System for Proper Function
After installation, thoroughly test the Goodman GSX13 system to ensure optimal performance. Check for refrigerant leaks and verify proper airflow. Start the system and monitor operation across all modes. Ensure the thermostat responds correctly and all safety features function. Record performance metrics for future reference and address any anomalies promptly to guarantee reliability and efficiency.
Commissioning and Final Checks
After installation, commissioning ensures the Goodman GSX13 operates as intended. Conduct a thorough inspection of all connections and components. Verify that the system meets specified performance criteria and adjustments are made if necessary. Perform operational tests under various conditions to ensure reliability. Document all findings and ensure compliance with manufacturer guidelines. Final checks confirm safety features are functional and the system is ready for use. Proper commissioning guarantees optimal performance and longevity of the unit.
Documentation and Record-Keeping
Accurate documentation is essential for future reference and compliance. Maintain detailed records of installation steps, settings, and adjustments. Include serial numbers, model specifics, and compliance certifications. Document all system tests and final checks for verification. Keep copies of warranties, manuals, and maintenance schedules. Organize records digitally or in a secure physical location. Proper documentation ensures accountability and simplifies future service or upgrades. It also aids in verifying compliance with local codes and manufacturer requirements.

Warranty and Registration Information
Goodman GSX13 systems come with a comprehensive warranty covering parts and labor. Registration is required for warranty activation. Terms and conditions are outlined in the manual.
Terms and Conditions of the Warranty
The Goodman GSX13 warranty provides coverage for parts and labor under specific conditions. The warranty period varies depending on product registration and installation compliance. Proper installation by a certified technician is mandatory to maintain warranty validity. Unauthorized modifications or improper maintenance can void the warranty. Coverage excludes damage caused by natural disasters, misuse, or failure to adhere to manufacturer guidelines. The warranty is non-transferable and applies only to the original purchaser. For full details, refer to the installation manual or contact Goodman customer support.
Registration Process for Warranty Activation
To activate the warranty for the Goodman GSX13, registration is required within 60 days of installation. Owners can register online through Goodman’s official website by providing the model and serial numbers, installation date, and installer details. Proper documentation, including the installation receipt, must be uploaded or mailed as specified. Registration ensures warranty coverage and validates the terms outlined in the manual. Failure to register within the timeframe may result in reduced or void warranty benefits. Refer to the manual for step-by-step registration instructions.
Exclusions and Limitations of the Warranty
The Goodman GSX13 warranty excludes coverage for damages caused by improper installation, neglect, or unauthorized modifications. Natural disasters, power surges, or extreme environmental conditions are also not covered. Additionally, the warranty does not apply to parts damaged due to lack of maintenance or use of non-approved replacement parts. Labor costs for repairs after the initial warranty period may not be covered. Always refer to the manual for a detailed list of exclusions and limitations to understand the full scope of the warranty terms.

Maintenance and Troubleshooting
Regular maintenance and troubleshooting ensure optimal performance and extend lifespan. Check filters, inspect wiring, and address common issues promptly. Complex problems may require professional assistance.
Regular Maintenance Tasks
Regular maintenance ensures the Goodman GSX13 operates efficiently and lasts longer. Clean or replace air filters monthly to maintain airflow and system performance. Check refrigerant levels annually and inspect for leaks. Ensure proper drainage by clearing condensate lines regularly. Inspect electrical connections and tighten them if necessary. Verify thermostat settings and calibration for accurate temperature control. Clean the outdoor coil to prevent debris buildup and ensure proper heat transfer. Schedule professional tune-ups annually to address complex issues and optimize performance. Consistent maintenance prevents breakdowns and maintains optimal functionality. Always follow the manual’s guidelines for best results.
Common Issues and Solutions
The Goodman GSX13 may encounter issues like reduced airflow, uneven cooling, or system shutdowns. Check for clogged air filters or blocked vents to restore airflow. Low refrigerant levels or leaks can cause cooling inefficiency; contact a professional to recharge or repair. If the system shuts down, ensure the thermostat is set correctly and power supply is stable. Strange noises may indicate loose parts or improper installation; tighten components or consult the manual. Addressing these issues promptly ensures reliable performance and extends the system’s lifespan. Always refer to the manual for troubleshooting guidance.
When to Contact a Professional
If you encounter complex issues like refrigerant leaks, electrical malfunctions, or system configuration problems, it’s best to contact a licensed HVAC technician. Professionals should handle tasks requiring specialized tools, such as refrigerant recharging or high-voltage electrical work. Additionally, if the system fails to operate after installation or exhibits persistent malfunctions, seek expert assistance. Always consult a professional for warranty-related repairs or if you’re unsure about troubleshooting steps to avoid further damage or safety hazards. Prioritize safety and system integrity by involving qualified experts when needed.

Accessing the Goodman GSX13 Manual
The Goodman GSX13 installation manual PDF is available on the official Goodman website or through authorized dealers. Visit the support section, navigate to the GSX13 model, and download the PDF for detailed installation guidelines and technical specifications.
Downloading the PDF Manual
To download the Goodman GSX13 installation manual PDF, visit the official Goodman Manufacturing website. Navigate to the “Resources” or “Support” section, where you can search for the GSX13 model. Select the appropriate manual from the results, and follow the prompts to download the PDF. Ensure you have the latest version for accurate installation instructions. Save the file to your device for easy access during the installation process. This manual is essential for understanding the specific requirements and guidelines for installing the GSX13 system correctly.
Navigating the Manual Content
The Goodman GSX13 installation manual PDF is organized into clear sections for easy navigation. Use the table of contents or index to quickly locate specific topics, such as installation steps or troubleshooting guides. Most PDF readers allow you to search for keywords or use bookmarks to jump between sections. Familiarize yourself with the layout to efficiently access the information you need. Pay special attention to highlighted sections, such as safety precautions and technical specifications, to ensure proper installation and system performance.
Understanding Technical Terminology
Understanding technical terms in the Goodman GSX13 manual is essential for a successful installation. Terms like SEER rating (Seasonal Energy Efficiency Ratio) indicate efficiency levels, while tonnage refers to cooling capacity. Refrigerant lines are tubes carrying coolant, and condenser coils dissipate heat. Familiarize yourself with these terms to grasp installation instructions fully. This knowledge ensures proper system setup and optimal performance, avoiding potential errors during the process.
The Goodman GSX13 installation manual is a comprehensive guide ensuring optimal performance and safety. Follow instructions carefully for proper setup and efficiency. Refer to it for future reference and troubleshooting.
Final Thoughts on Proper Installation
Proper installation of the Goodman GSX13 is crucial for optimal performance, efficiency, and safety. Adhering to the manual ensures compliance with industry standards and prevents potential issues. Pay attention to leveling, electrical connections, and refrigerant handling. Regular maintenance, as outlined, will extend the system’s lifespan. If unsure, consult a certified technician to avoid voiding the warranty. Proper installation not only enhances comfort but also ensures energy savings and reliable operation over time. Always refer to the manual for specific guidance tailored to your unit.
Encouragement for Further Reading
The Goodman GSX13 installation manual is a valuable resource for ensuring a smooth and efficient setup. By diving deeper into the manual, you’ll gain insights into troubleshooting, maintenance, and optimizing system performance. Exploring the detailed sections will help you understand how to get the most out of your HVAC system. Take the time to review each chapter thoroughly, as it contains practical tips and essential information to keep your unit running at its best. Your thorough understanding will lead to better performance and longevity of the system.